Time to talk about something serious.
I will concede that hosting a cross-platform Minecraft server on a Raspberry Pi might not be as essential as the access to drinking water or the right to education.
However, I would argue that the access to a private, persistent, virtual world for you and your friends is something important enough that should be considered a basic commodity.
If not a birth right, of course.
Anyway, in terms of time and effort, the cost of setting up such a server is a barrier that too often jeopardizes the potential of many hours of quality time.
The main issue is the mismatch between the supported CPU architecture for the server executable and the architecture of the chip mounted on the Raspberry Pi. The Pi, being small and low-power, is the perfect device to host a Minecraft server. However, Bedrock servers only support Intel/AMD architectures, while the Pi uses an ARM chip. Thanks to Docker we can emulate a x86-64 architecture on an ARM host.
So here are, for future reference, simple instructions to quickly build and execute a Docker image that should be sufficient to have a server up and running. The following is tested on a Raspberry Pi 4 with a fresh install of Raspberry OS Lite.
1. Get your Bedrock server
Get and unzip the appropriate software from the download page. Alternatively, you can use your already existing server data.
Here the server directory is going to be called minepi, and default values are assumed for minepi/server.properties.
2. Write the Dockerfile
Define a basic Ubuntu-based image in Dockerfile, which will provide a suitable environment to run the server.
FROM ubuntu:noble-20241118.1
RUN apt-get update && apt install -y libcurl4-openssl-dev libssl-dev
WORKDIR /minepi
ENTRYPOINT [ "bash", "-c", "LD_LIBRARY_PATH=. ./bedrock_server" ]
3. Build the image (for x86-64!)
Install QEMU, which is required to emulate the target CPU architecture:
sudo apt install qemu-user-static
Build the image specifying the target architecture, optionally saving the command in build.sh for future reference:
docker build --platform linux/amd64 -t minepi .
4. Run the container
The gameplay happens by default on 19132 TCP and UDP ports for Bedrock Edition servers. When running the container, we need to map this container port to the corresponding port on the host. We also need to make possible for the container to access the directory (minepi) on disk which contains the server data and executable:
docker run --platform linux/amd64 -v "$(pwd)/minepi/:/minepi/" -p 19132:19132/udp minepi
Optionally save the command above in start.sh for future reference.
Once the server is up and running, use:
stop
to stop the server and the container.
So there you have it, your world as it should be.
Private, persistent, virtual.

Notes on connecting from a Switch
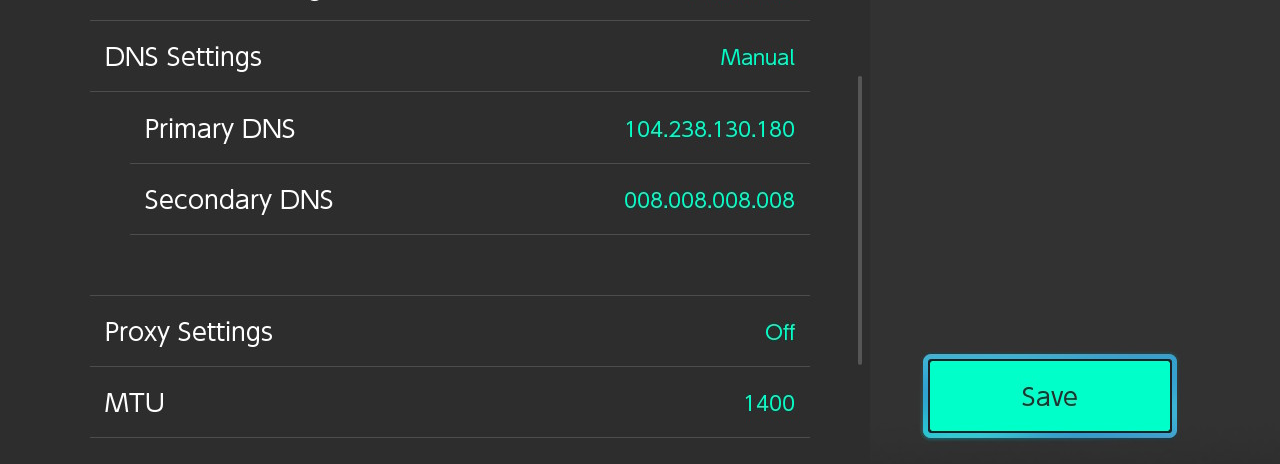
The server works cross-platform. In some cases, you might want to connect via a Nintendo Switch. To do so, it is first necessary to specify a custom DNS in order to bypass restrictions due to Xbox Live and Nintendo’s policies, which by default would allow the player to only connect to official Mojang servers.
In the Switch Internet settings, set the following for your connection:
- Primary DNS:
104.238.130.180 - Secondary DNS:
8.8.8.8

Then, start Minecraft. The Nintendo Switch version does not have a properly built-in option to add custom server addresses, as seen on other platforms like PC. Nevertheless, it is possible to connect to and save a private server by specifying the server’s IP and port. To do so:
- Select “Play” –> “Servers”.
- Select Join Server on any of the listed official servers. With the new DNS settings, this will not actually connect to the selected server. It will open a different menu instead.
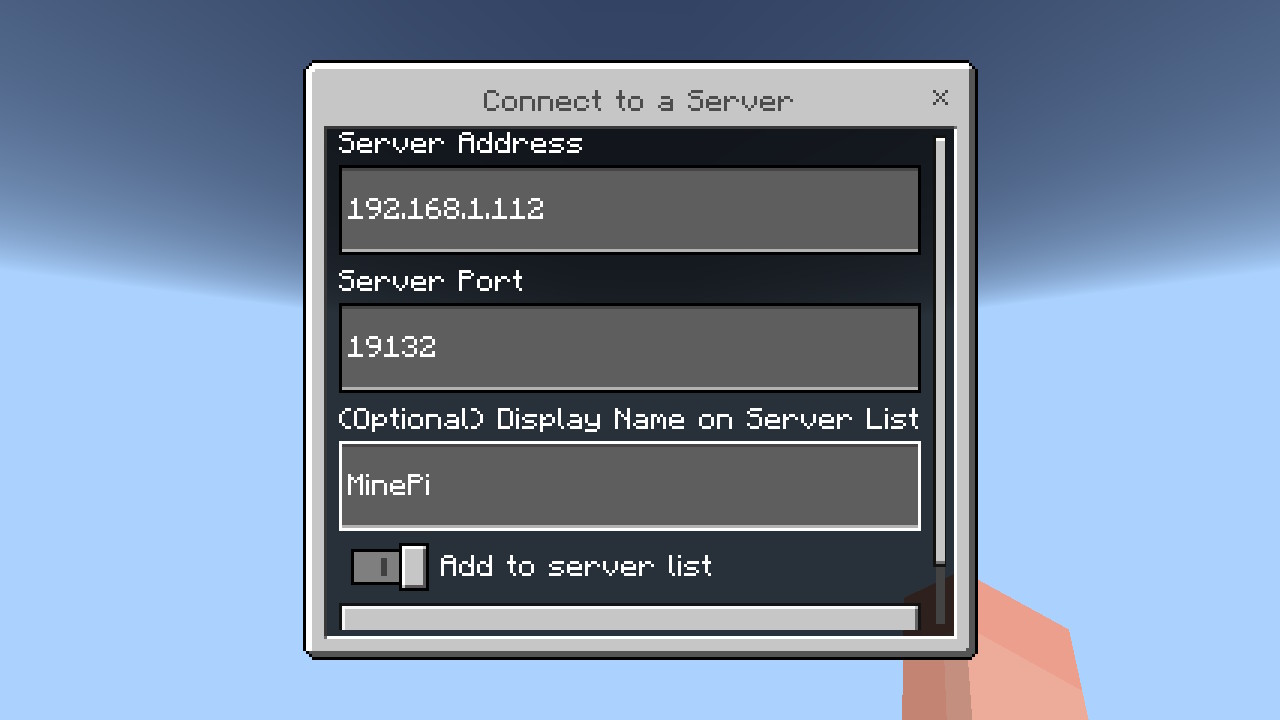
- Select Connect to a Server
- Insert your server’s IP address and port, and connect.
- Don’t dig straight down!
